

Integrating HDP Compute Frameworks with Alluxio
![]()

This guide describes how to configure Hortonworks Data Platform (HDP) compute frameworks with Alluxio.
Prerequisites
You should already have Hortonworks Data Platform installed. HDP 3.1 has been tested and Ambari is used for the instructions in the rest of this document.
It is also assumed that Alluxio has been installed on the cluster.
Running HDP MapReduce
To run HDP MapReduce applications with Alluxio, some additional configuration is required.
Configuring core-site.xml
You need to add the following properties to core-site.xml. The ZooKeeper properties are only required for a cluster
using HA mode. Similarly, embedded journal properties are only required for an HA cluster using Embedded Journal.
<property>
  <name>fs.alluxio.impl</name>
  <value>alluxio.hadoop.FileSystem</value>
</property>
<property>
  <name>alluxio.zookeeper.enabled</name>
  <value>true</value>
</property>
<property>
  <name>alluxio.zookeeper.address</name>
  <value>zknode1:2181,zknode2:2181,zknode3:2181</value>
</property>
<property>
  <name>alluxio.master.embedded.journal.addresses</name>
  <value>alluxiomaster1:19200,alluxiomaster2:19200,alluxiomaster3:19200</value>
</property>
You can add configuration properties to core-site.xml file with Ambari. In the “HDFS” section of
Ambari, the “Advanced” tab of the “Configs” tab has the “Custom core-site” section. In this section,
click on the “Add Property” link to add these new configuration properties.
You can add each property individually or in batch. If you are adding them individually, like:
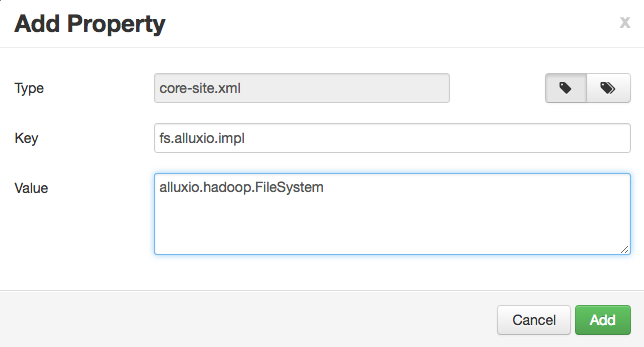
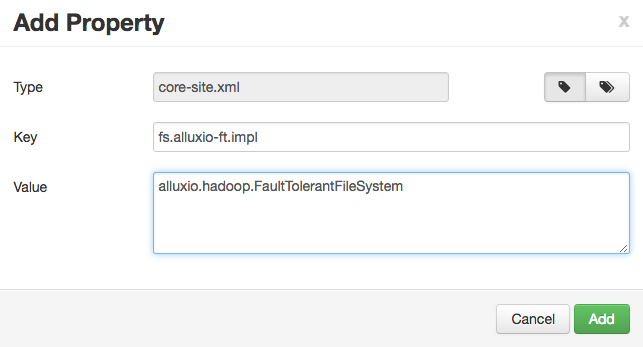
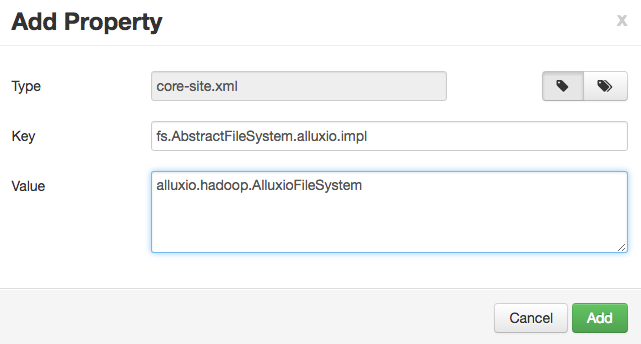
Alternatively, you can add the properties in batch, with a list of key=value pairs.
fs.alluxio.impl=alluxio.hadoop.FileSystem

After the properties are added, the “Custom core-site” section should have the following properties:

Save the configuration, and Ambari will notify you that you should restart the affected components. Accept this option to update the new properties.
Configuring HADOOP_CLASSPATH
In order for the Alluxio client jar to be available to the MapReduce applications, you must add
the Alluxio Hadoop client jar to the $HADOOP_CLASSPATH environment variable in hadoop-env.sh.
In the “HDFS” section of Ambari, the “Advanced” tab of the “Configs” tab has the “Advanced hadoop-env” section. In this section, you can add to the “hadoop-env template” parameter:
export HADOOP_CLASSPATH=/path/to/alluxio/client/alluxio-enterprise-2.6.0-2.13-client.jar:${HADOOP_CLASSPATH}
Then save the configuration, and Ambari will notify you that you should restart the affected components. Please restart the affected components.
Security
Since MapReduce runs on YARN, a non-secured Alluxio will need to be configured to allow the yarn user to impersonate
other users. To do this, add the below property to alluxio-site.properties on Alluxio Masters and Workers and then
restart the Alluxio cluster.
alluxio.master.security.impersonation.yarn.users=*
This is not required if Alluxio and YARN are Kerberized and Secured.
Running MapReduce Applications
In order for MapReduce applications to be able to read and write files in Alluxio, the Alluxio client jar must be distributed to all the nodes in the cluster, and added to the application classpath.
Below are instructions for the 2 main alternatives for distributing the client jar:
Using the -libjars command line option
You can run a job by using the -libjars command line option when using yarn jar ...,
specifying
/path/to/alluxio/client/alluxio-enterprise-2.6.0-2.13-client.jar as the argument. This
will place the jar in the Hadoop DistributedCache, making it available to all the nodes. For
example, the following command adds the Alluxio client jar to the -libjars option:
$ yarn jar /usr/hdp/current/hadoop-mapreduce-client/hadoop-mapreduce-examples.jar randomtextwriter -libjars /path/to/alluxio/client/alluxio-enterprise-2.6.0-2.13-client.jar <OUTPUT URI>
Setting the classpath configuration variables
If the Alluxio client jar is already distributed to all the nodes, you can add that jar to the
classpath using the mapreduce.application.classpath variable.
In Ambari, you can find the mapreduce.application.classpath variable in the “MapReduce2” section,
“Advanced” configuration, under the “Advanced mapred-site” section. Add the Alluxio client jar to the mapreduce.application.classpath parameter.
/path/to/alluxio/client/alluxio-enterprise-2.6.0-2.13-client.jar

After you save the configuration, restart the affected components.
Running Sample MapReduce Application
Here is an example of running a simple MapReduce application. In the following example,
replace MASTER_HOSTNAME with your actual Alluxio master hostname.
$ yarn jar /usr/hdp/current/hadoop-mapreduce-client/hadoop-mapreduce-examples.jar randomtextwriter -Dmapreduce.randomtextwriter.bytespermap=10000000 alluxio://MASTER_HOSTNAME:19998/testing/randomtext/
You can find the MASTER_HOSTNAME by running ./bin/alluxio fs leader.
After this job completes, there will be randomly generated text files in the /testing/randomtext directory in Alluxio.
Running HDP HBase
Distribute Alluxio Client Jar to HBase
We need to make the Alluxio client jar file available to HBase, because it contains the configured alluxio.hadoop.FileSystem class.
There are two ways to achieve this.
Add Alluxio Client Jar to HBASE_CLASSPATH
You can specify the location of the jar file in the $HBASE_CLASSPATH environment variable.
In the “HBase” section of Ambari, in the “Configs” tab, go to the “Advanced” tab and search for
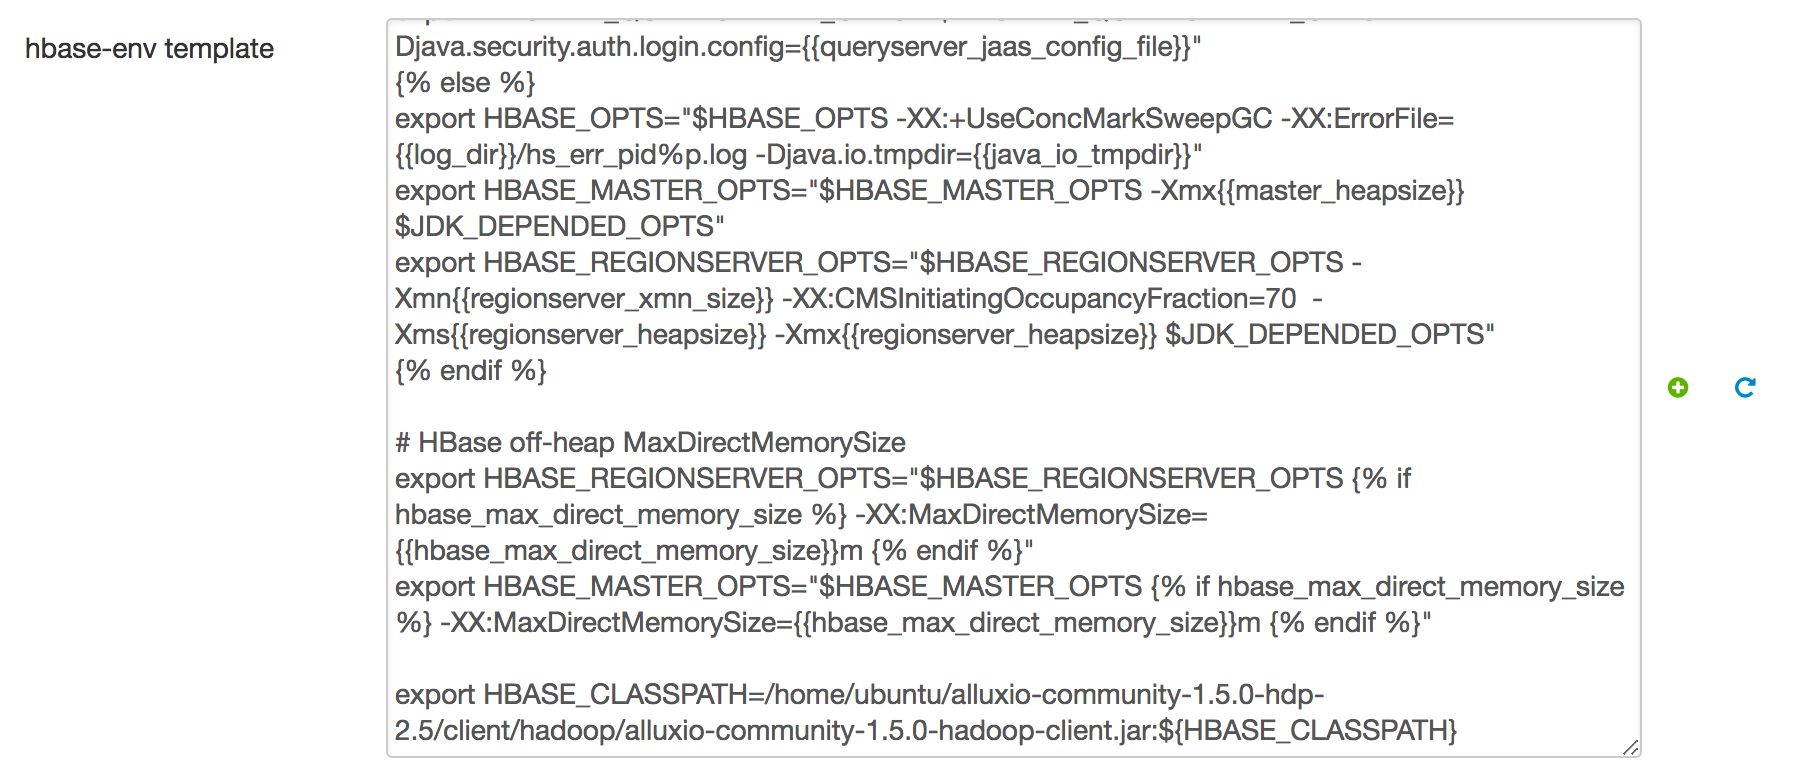
the parameter “Advanced hbase-env”. For “hbase-env template”, add the following line:
export HBASE_CLASSPATH=/path/to/alluxio/client/alluxio-enterprise-2.6.0-2.13-client.jar:${HBASE_CLASSPATH}
It should look something like this:
Then save the configuration, and Ambari will notify you that you should restart the affected components. Please restart the affected components.
Copy Alluxio Client Jar to HBase
An alternative way to distribute Alluxio Client jar is to copy it directly to HBase.
You can put the alluxio client jar file into the lib directories of HBase.
Please ensure this is done on all the HDP HBase nodes.
$ cp /path/to/alluxio/client/alluxio-enterprise-2.6.0-2.13-client.jar /usr/hdp/current/hbase-master/lib/
$ cp /path/to/alluxio/client/alluxio-enterprise-2.6.0-2.13-client.jar /usr/hdp/current/hbase-client/lib/
$ cp /path/to/alluxio/client/alluxio-enterprise-2.6.0-2.13-client.jar /usr/hdp/current/hbase-regionserver/lib/
HBase needs to be restarted after this is done.
Configuring hbase-site.xml
Before restarting HBase running on Alluxio, please create a /tmp directory and set the mode to 0777 in Alluxio:
$ ./bin/alluxio fs mkdir /tmp
$ ./bin/alluxio fs chmod -R 0777 /tmp
$ ./bin/alluxio fs mkdir /hbase
$ ./bin/alluxio fs chmod -R 0777 /hbase
$ ./bin/alluxio fs mkdir /apps
$ ./bin/alluxio fs chmod -R 0777 /apps
Then configure hbase-site.xml according to Running HBase on Alluxio
In Ambari, this can be done as follows.
First, in the “HBase” section of Ambari, in the “Configs” tab, go to the “Advanced” tab and search for
the parameter “Advanced hbase-site”. For “hbase.rootdir”, set the value to alluxio://HOSTNAME:PORT/hbase/data.
It should look something like this:

Second, in the “HBase” section of Ambari, in the “Configs” tab, go to the “Advanced” tab and search for the parameter “Custom hbase-site”. Click on “Add Property …” and add the properties in the “Properties” box:
It should look something like this:
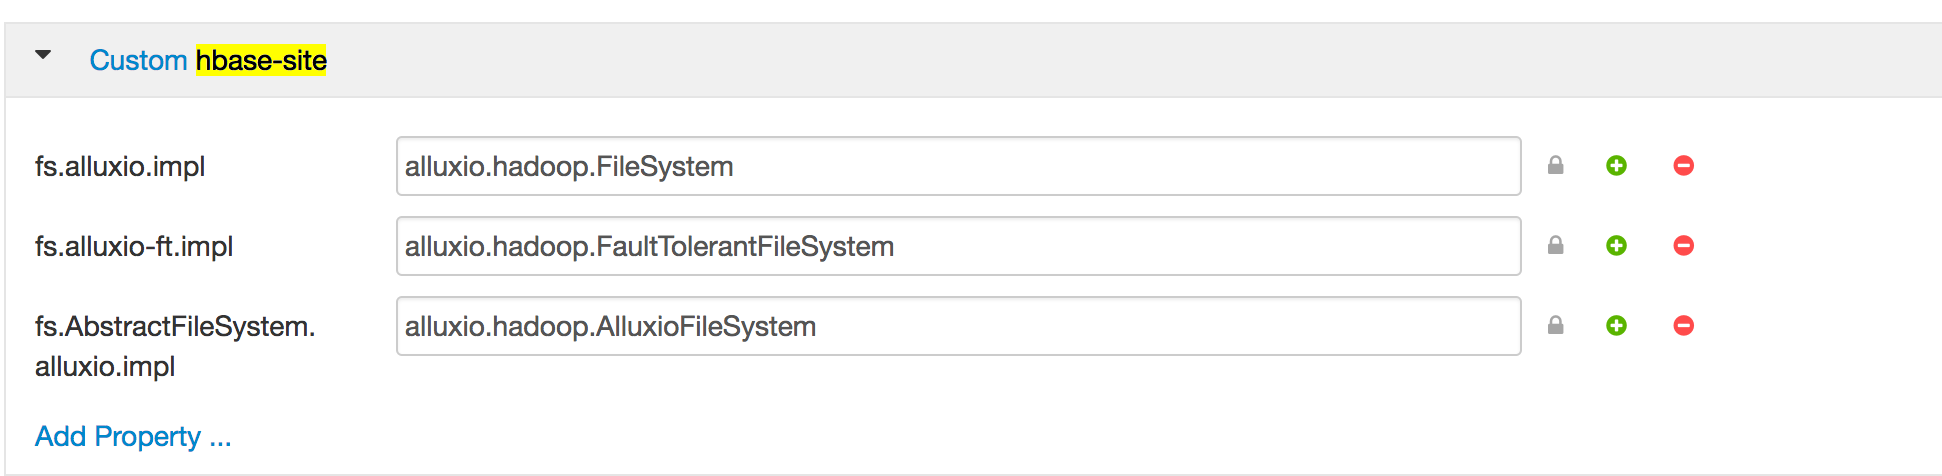
Then save the configuration, and Ambari will notify you that you should restart the affected components. Please restart the affected components.
Add additional Alluxio Properties for HBase
If there are any Alluxio site properties you want to specify for HBase, add those to hbase-site.xml
similarly as setting the properties above.
Then save the configuration, and Ambari will notify you that you should restart the affected components. Please restart the affected components.
Running Sample HBase Application
Before running HBase applications, visit HBase Web UI at http://<hostname>:16010 or http://<hostname>:60010 to confirm that HBase
is running on Alluxio (check the HBase Root Directory attribute).
And visit Alluxio Web UI at http://<hostname>:19999, click Browse and you can see the files HBase stores on Alluxio, including data and WALs.
Then, you can follow the sample HBase application on Running-HBase-on-Alluxio.
Running HDP Hive
Configuring HDP Hive with Alluxio
To run HDP Hive applications with Alluxio, additional configuration is required for the applications.
In the “Hive” section of Ambari, in the “Configs” tab, go to the “Advanced” tab and search for the parameter “Advanced hive-env”. In “hive-env template”, add the following line:
export HIVE_AUX_JARS_PATH=/path/to/alluxio/client/alluxio-enterprise-2.6.0-2.13-client.jar:${HIVE_AUX_JARS_PATH}
It should look something like this:
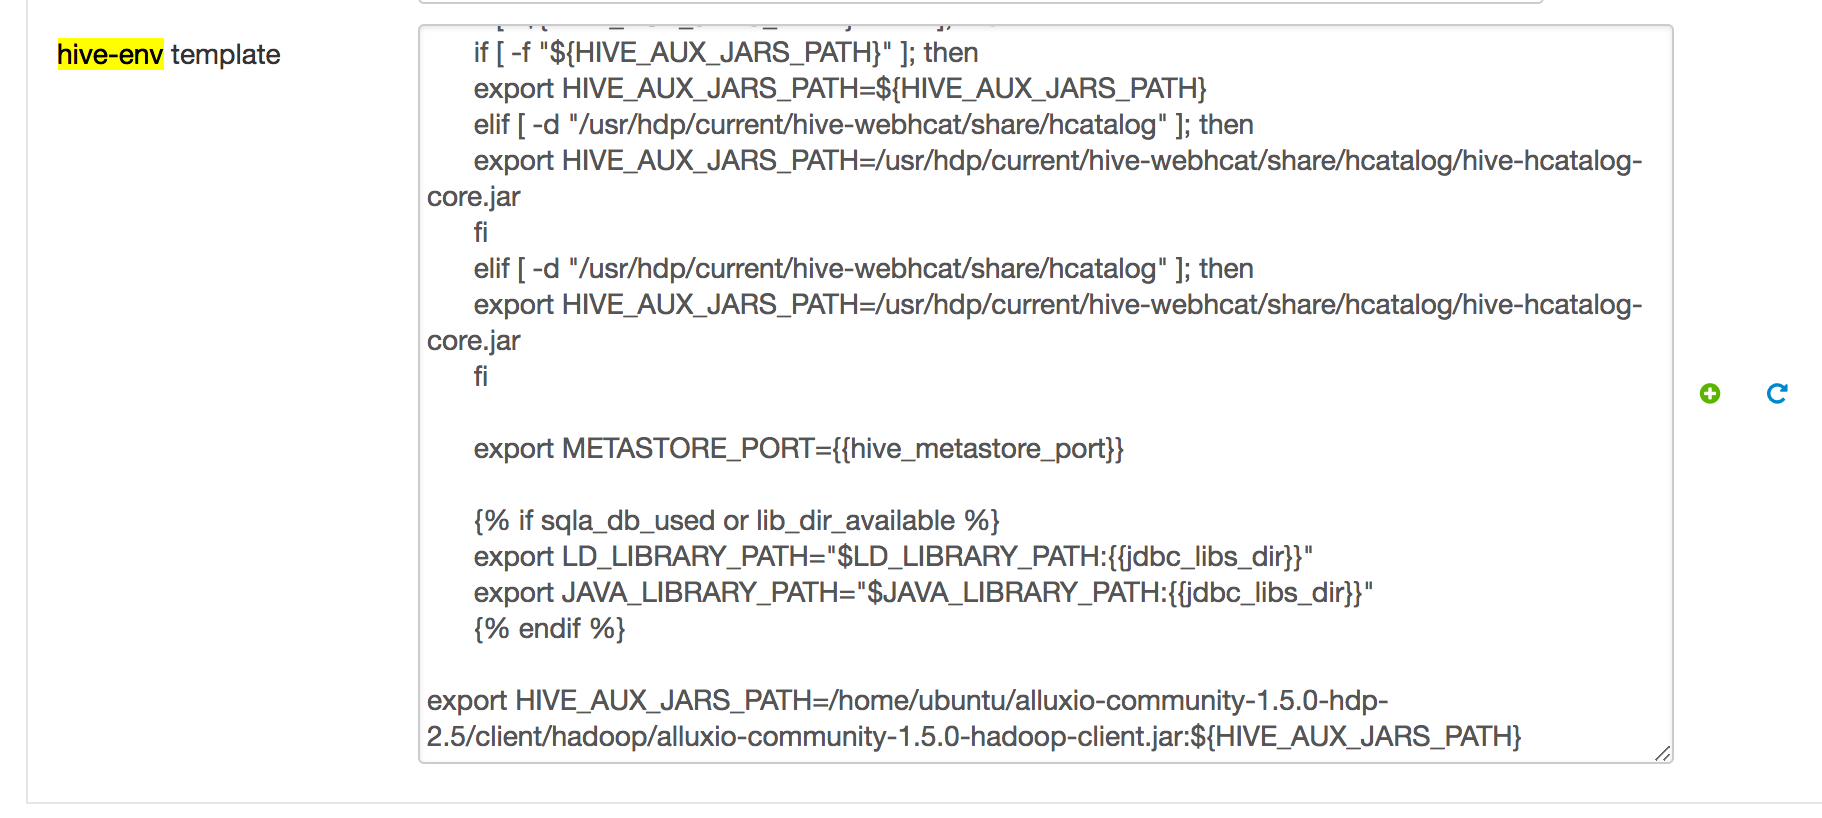
Then save the configuration, and Ambari will notify you that you should restart the affected components. Please restart the affected components.
Security
For impersonation, Alluxio will need to be configured to allow the hive user to impersonate other users. To do this,
add the below property to alluxio-site.properties on Alluxio Masters and Workers and then restart the Alluxio cluster.
alluxio.master.security.impersonation.hive.users=*
Note that if hive.doAs is disabled, this property is not required.
Create External Table Located in Alluxio
With the HIVE_AUX_JARS_PATH set, Hive can create external tables from files stored on Alluxio.
You can follow the sample Hive application on Running-Hive-on-Alluxio.
to create an external table located in Alluxio.
(Optional) Use Alluxio as Default Filesystem in HDP Hive
Hive can also use Alluxio through a generic file system interface to replace the Hadoop file system. In this way, the Hive uses Alluxio as the default file system and its internal metadata and intermediate results will be stored in Alluxio by default. To set Alluxio as the default file system for HDP Hive, in the “Hive” section of Ambari, in the “Configs” tab, go to the “Advanced” tab and search for the parameter “Custom hive-site”. Click on “Add Property …” and add the following property in the “Properties” box:
fs.defaultFS=alluxio://HOSTNAME:PORT/
It should look something like this:

Then save the configuration, and Ambari will notify you that you should restart the affected components. Please restart the affected components.
When using Alluxio as the defaultFS, Hive’s warehouse will point to alluxio://master:19999/user/hive/warehouse. This
directory should be created and given permissions hive:hive. This also allows users to define internal tables on
Alluxio.
(Optional) Add additional Alluxio Properties in Hive
If there are any Alluxio site properties you want to specify for Hive, add those to hive-site.xml
similarly as setting the properties above.
Then save the configuration, and Ambari will notify you that you should restart the affected components. Please restart the affected components.
Running Sample Hive Application
You can follow the sample Hive application on Running-Hive-on-Alluxio.
Running HDP Spark
To run HDP Spark applications with Alluxio, additional configuration is required for the applications.
There are two scenarios for the Spark and Alluxio deployment. If you already have the Alluxio Spark client jars on all the nodes on the cluster, you only have to specify the correct path to for the classpath. Otherwise, you can allow Spark to distribute the Alluxio Spark client jar to each Spark node for each invocation of the application.
Security
For impersonation, Alluxio will need to be configured to allow user yarn to impersonate other users. To do this,
add the below property to alluxio-site.properties on Alluxio Masters and Workers and then restart the Alluxio cluster.
alluxio.master.security.impersonation.yarn.users=*
Alluxio Spark Client Jar Already on Each Node
If the Alluxio Spark client jar is already on every node, you have to add that path to the classpath for
the Spark driver and executors. In order to do that, use the spark.driver.extraClassPath and the
spark.executor.extraClassPath variables.
For spark-submit an example looks like the following. (In the example, replace MASTER_HOSTNAME with the
actual Alluxio master hostname.)
$ spark-submit --master yarn --conf "spark.driver.extraClassPath=/path/to/alluxio/client/alluxio-enterprise-2.6.0-2.13-client.jar" --conf "spark.executor.extraClassPath=/path/to/alluxio/client/alluxio-enterprise-2.6.0-2.13-client.jar" --class org.apache.spark.examples.JavaWordCount /usr/hdp/current/spark2-client/examples/jars/spark-examples_2.11-2.3.2.3.1.4.0-315.jar alluxio://MASTER_HOSTNAME:19998/testing/randomtext/
Note: This example will run a word count on all text files under Alluxio path
/testing/randomtext/.
And similarly, for spark-shell, the following is an example:
$ spark-shell --master yarn --driver-class-path "/path/to/alluxio/client/alluxio-enterprise-2.6.0-2.13-client.jar" --conf "spark.executor.extraClassPath=/path/to/alluxio/client/alluxio-enterprise-2.6.0-2.13-client.jar"
Distribute Alluxio Spark Client Jar for Each Application
If the Alluxio Spark client jar is not already on each machine, you can use the --jars option
to distribute the jar for each application.
For example, using spark-submit would look like:
$ spark-submit --master yarn --jars /path/to/alluxio/client/alluxio-enterprise-2.6.0-2.13-client.jar --class org.apache.spark.examples.JavaWordCount /usr/hdp/current/spark2-client/examples/jars/spark-examples_2.11-2.3.2.3.1.4.0-315.jar alluxio://MASTER_HOSTNAME:19998/testing/randomtext/
Using Ranger to manage authorization policies for Alluxio
Ranger enables administrator to centralize permission management for various resources. Alluxio supports using Ranger to manage and enforce access to directories and files.
There are two ways to use Ranger with Alluxio. User can use Ranger to directly manage Alluxio file system permissions, or configure Alluxio to enforce existing Ranger policies for HDFS under file systems. While it is possible to use Ranger to manage permissions for both Alluxio and under file systems, we don’t recommend enabling both at the same time because it can be confusing to reason about permissions over multiple sources of truth.
Managing Alluxio permissions with Ranger
First, make sure HDFS plugin is enabled in Ranger configuration. Follow the instruction in this page to set up a new HDFS repository for Alluxio. In the name node URL field, please put down the Alluxio service URI.
Copy core-site.xml, hdfs-site.xml, ranger-hdfs-security.xml, ranger-hdfs-audit.xml and ranger-policymgr-ssl.xml
from /etc/hadoop/conf/ on HDFS name node to a directory in Alluxio master nodes. Update the configuration
settings in ranger-hdfs-security.xml to use the new HDFS repository. Specifically:
- Set
ranger.plugin.hdfs.policy.cache.dirto a valid directory on Alluxio master nodes where you want to store the policy cache. - Set
ranger.plugin.hdfs.policy.rest.ssl.config.fileto point to the path of theranger-policymgr-ssl.xmlfile on Alluxio master node. - Set
ranger.plugin.hdfs.service.nameto be the new HDFS repository name. - Verify that
ranger.plugin.hdfs.policy.rest.urlis pointing to the correct Ranger service URL. - Set
xasecure.add-hadoop-authorizationto true if you want Ranger to fallback to Alluxio default permission checker when a path is not managed by Ranger policy.
Configure Alluxio masters to use Ranger plugin for authorization. In alluxio-site.properties, add the
following properties:
alluxio.security.authorization.plugins.enabled=true
alluxio.security.authorization.plugin.name=<plugin_name>
alluxio.security.authorization.plugin.paths=<your_ranger_plugin_configuration_files_location>
alluxio.security.authorization.plugin.name should be either ranger-hdp-2.5 or ranger-hdp-2.6 depending on
your HDP cluster version.
alluxio.security.authorization.plugin.paths should be the local directory path on Alluxio master where you
put the Ranger configuration files.
Restart all Alluxio masters to apply the new configurations. Now you can add some policies to the Alluxio repository in Ranger and verify it taking effect in Alluxio.
If Hive is used to work with data on Alluxio, please add the Alluxio scheme to the value of property
ranger.plugin.hive.urlauth.filesystem.schemes in Hive configuration:
ranger.plugin.hive.urlauth.filesystem.schemes=hdfs:,file:,wasb:,adl:,alluxio:
Enforcing existing Ranger policies for HDFS under file system
Alluxio can be configured to enforce existing Ranger policies on HDFS under filesystems. First,
Copy core-site.xml, hdfs-site.xml, ranger-hdfs-security.xml, ranger-hdfs-audit.xml and ranger-policymgr-ssl.xml
from /etc/hadoop/conf/ on HDFS name node to Alluxio master nodes. Update the configuration settings in
ranger-hdfs-security.xml to use the new HDFS repository. Specifically:
- Set
ranger.plugin.hdfs.policy.cache.dirto a valid directory on Alluxio master nodes where you want to store the policy cache for this under file system. - Set
ranger.plugin.hdfs.policy.rest.ssl.config.fileto point to the path of theranger-policymgr-ssl.xmlfile on Alluxio master node. - Verify that
ranger.plugin.hdfs.policy.rest.urlis pointing to the correct Ranger service URL.
Configure Alluxio masters to use Ranger plugin for authorization. In alluxio-site.properties, add the following properties:
alluxio.security.authorization.plugins.enabled=true
If the HDFS file system is mounted as root under file system, Add the following properties in alluxio-site.properties:
alluxio.master.mount.table.root.option.alluxio.underfs.security.authorization.plugin.name=<plugin_name>
alluxio.master.mount.table.root.option.alluxio.underfs.security.authorization.plugin.paths=<your_ranger_plugin_configuration_files_location>
alluxio.underfs.security.authorization.plugin.name should be either ranger-hdp-2.5 or ranger-hdp-2.6 depending on
your HDP cluster version for Ranger service managing the under file system.
alluxio.underfs.security.authorization.plugin.paths should be the local directory path on Alluxio master where you
put the Ranger configuration files for the corresponding under file system.
Please note that Alluxio masters need to be reformatted and then restarted for this change to take effect.
If the HDFS file system is supposed to be mounted as a nested under filesystem using the alluxio fs mount command,
please add the following parameters to your mount command:
--option alluxio.underfs.security.authorization.plugin.name=<plugin_name>
--option alluxio.underfs.security.authorization.plugin.paths=<your_ranger_plugin_configuration_files_location>